
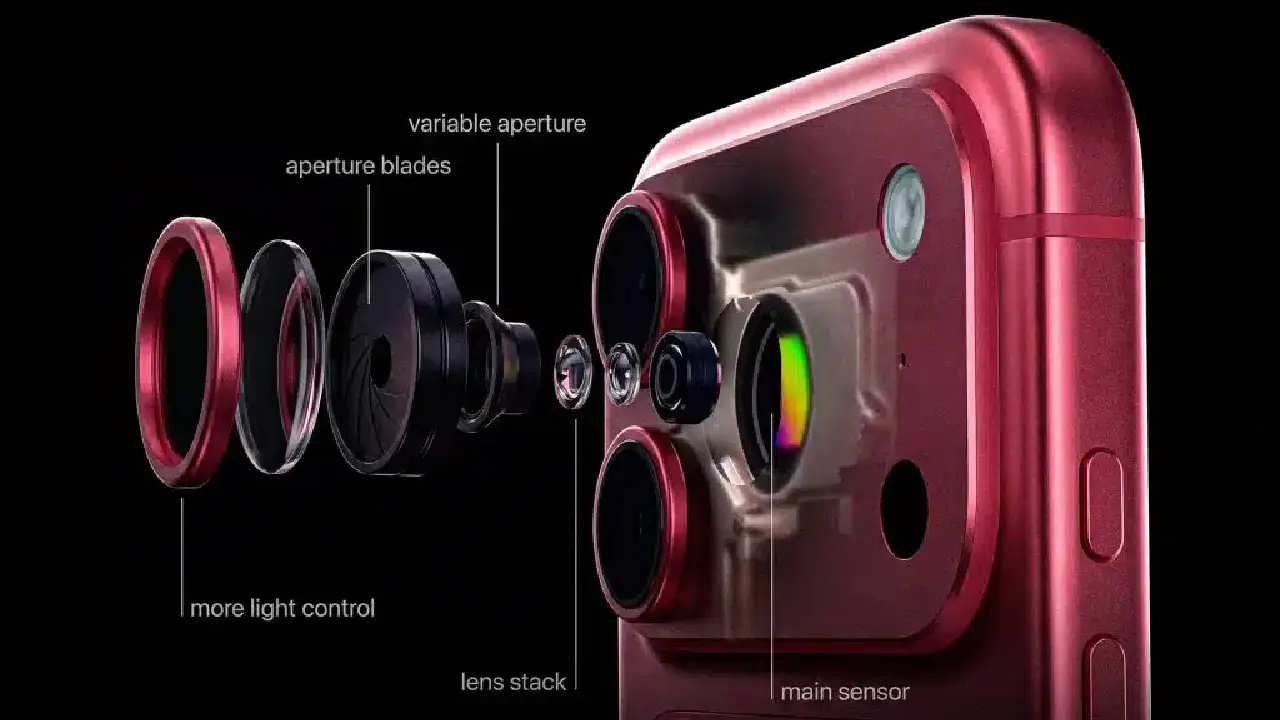
The iPhone 18 Pro variable aperture changes the opening in its main camera lens, giving the camera another way to control light and depth of field. Apple lists four settings: f/1.48, f/1.8, f/2.8 and f/4.0. The feature is available on both the iPhone 18 Pro and Pro Max. It is different from adjusting background blur in a Portrait photo after taking it. Source: Apple’s camera specifications.
For a buyer, the useful question is what this changes in everyday pictures. A camera specification only becomes valuable when it helps with a scene you actually photograph, such as a dim room, a tabletop arrangement or people standing at different distances.
Research checked September 18, 2026. This AI-assisted explainer uses Apple’s published product information and photography guidance from Nikon. We have not tested the iPhone 18 Pro camera. Shooting suggestions below apply general photography principles; they are not measured results or a verified walkthrough of the camera interface.
What variable aperture means
Aperture is the opening through which light travels inside a lens. A lower f-number describes a wider opening; a higher number describes a narrower one. With other conditions held constant, a wider opening admits more light and produces shallower depth of field. A narrower opening admits less light and increases the range of distances that appear acceptably sharp. Nikon explains aperture and depth of field.
That trade-off matters. More depth can help keep objects at different distances clear, but reduced light may require a slower shutter speed or greater sensitivity. The camera’s exposure decisions and processing also affect the final picture. An aperture change alone does not guarantee a brighter or sharper finished image.
The four settings Apple lists
Apple describes automatic aperture adjustment and manual aperture control through the Camera app’s Pro controls. Its product page identifies f/1.8 as the default setting and describes the other options in terms of light gathering and depth. See Apple’s variable-aperture explanation.
| Setting | Apple’s stated role | A scene to try |
|---|---|---|
| f/1.48 | Widest opening; maximum light | A stationary subject in a dim room |
| f/1.8 | Default balance | An everyday photo to use as a reference |
| f/2.8 | Greater depth of field | Several objects at different distances in good light |
| f/4.0 | Greatest depth among these options | A well-lit arrangement where front and rear detail matter |
These are starting points for comparison, not universal best settings. Take a reference picture first, then check whether changing the aperture solves the problem you noticed.
Which cameras have variable aperture?
The listed four-step aperture belongs to the 48MP Fusion Main camera. Apple’s specifications list the ultra-wide camera at f/2.2 and the telephoto camera at f/2.8. Do not assume the same adjustable opening applies to every lens. The feature is shared by the two Pro sizes, so it is not a reason by itself to pay more for the Max. Check Apple’s lens specifications.
How it differs from Portrait mode
A physical aperture affects the light captured when the photograph is made. Portrait Depth Control changes the background-blur effect in a supported image. Apple documents adjusting that effect in Photos after capture. Moving this editing slider does not reopen the lens or record the original scene again. Apple’s Portrait editing guide.
This distinction is useful when comparing samples. A soft background may come from optical depth of field, software-applied blur or a combination of the two. Ask whether Portrait effects were enabled before treating a pair of images as proof of what the physical aperture changed.
Practical examples: what to look for
A dim indoor scene: use a still object as your first subject. Compare fine detail and noise, not just overall brightness. For people or pets in motion, also inspect whether movement looks blurred. A pleasing image of a motionless object does not establish how well the phone handles a moving child.
A group photograph: examine faces toward the front and back of the group. Try to keep people at similar distances when possible, and check the actual result before moving on. No aperture setting can rescue every poorly arranged group or incorrect focus choice.
Food or products: decide whether the entire subject should be clear or one detail should draw attention. Photograph a mug with another object behind it. Keep your position and focus point consistent so you can judge how the background changes.
A quick snapshot: begin with automatic operation. Manual control is most useful when you can identify a problem and have time to compare alternatives. Changing settings repeatedly while a moment passes can be less helpful than getting a usable first frame.
A simple comparison you can run yourself
- Choose a stable, well-lit scene with one nearby object and another farther behind it.
- Use the main camera and keep the phone in the same position for each photograph.
- Keep the focus point consistent and disable Portrait blur effects for this comparison.
- If the selected mode exposes manual aperture, photograph the scene at each available setting. Consult the current on-device help for the exact controls.
- Check front and rear detail at the same viewing size. Record shutter speed and ISO from image information where available.
This is a learning exercise, not a laboratory benchmark. Automatic exposure can change between frames. If the comparison is inconclusive, repeat it with steadier lighting before drawing conclusions. Keep the original files if you plan to share your results.
Is variable aperture a reason to upgrade?
Our view is that it deserves attention if you enjoy controlling photographs or repeatedly encounter scenes where depth and available light compete. It is a weaker reason to replace a phone whose camera already meets your needs.
Before buying, seek original, matched samples from the scenes you care about. Look for reviewers who explain their settings and show unsuccessful shots as well as highlights. Manufacturer specifications explain the available controls; they do not establish how large an improvement you will see.
For a broader buying comparison, read our iPhone Duo vs iPhone 18 Pro Max guide. If you are choosing between Pro sizes, remember that this aperture feature is shared; handling, price and your other priorities should guide that choice.